Imagine the smell of freshly made pizza filling your garden as the wood crackles to provide ideal heat for a crispy crust. One great approach to getting that real wood-fired pizza experience into your outdoor area is building a pizza oven at home. Beyond merely baking pizza, a wood-fired oven provides the flexibility to bake bread, roast veggies, and even create sweets all with a distinctive, smoky flavor you cannot get with a standard home oven. Although building your pizza oven is a fun endeavor, it calls for some preparation, the correct tools, and patience.
This book will coach you through the basics of building a wood-fired pizza oven regardless of your level of experience with do-it-yourself projects or outdoor construction. We will go over everything from picking fire bricks to deciding on a site to building a strong base to designing a workable oven floor. Your outdoor pizza oven will start to be a gathering place for family, friends, and wonderful cuisine with the correct techniques and tools.
Planning your pizza oven project
There are some very important planning stages to guarantee the final pizza oven is safe, effective, and long-lasting before you begin building one. Let’s review some preliminary choices that will influence the construction procedure and assist you in designing a pizza oven that fulfills your requirements.
Choosing the oven location
The first step is picking the perfect location for your outdoor pizza oven. Consider safety, airflow, and convenience. Select a spot that’s spacious enough for both the oven and a cooking area around it, allowing easy access to wood, cooking utensils, and space for people to gather. Proper airflow is essential for maintaining high temperatures inside the oven, so make sure there’s enough open space around it to support this.
Determining the design
There are several forms for pizza ovens; the most often used ones are the barrel-shaped and dome-shaped ones. Both forms have advantages; a dome oven stores heat quite effectively and a barrel-shaped oven can be simpler to build. Think about the internal diameter and dome height since these factors directly affect how evenly your oven will heat food and heat retention capacity. Usually with an inside diameter of around 32 inches (ca. 81 cm), a standard wood-fired pizza oven allows adequate space to cook pizzas while maintaining consistent heat distribution.
Materials needed
Gathering materials is the next critical step. Here’s a quick overview of what you’ll need:
- Fire bricks: These are a must for the oven floor and dome, as they can withstand high temperatures and retain heat well.
- Clay bricks: Used for the outer structure if desired, though they don’t retain heat like fire bricks.
- Refractory mortar: Designed to bond fire bricks in high-heat applications, providing a durable, heat-resistant structure.
- Concrete blocks and concrete slab: Form the stable base for the oven.
- Cement and cement board: Additional materials for the structure and insulation.
- Additional items: Tools like a pizza peel, sand, mosaic tiles for decoration, and insulation materials like glass bottles for heat retention.
Many of these items can be found at your local hardware store, such as Home Depot, making it easy to gather the necessary supplies. But we suggest picking high-quality materials, like those provided by Vitcas.
These important choices will equip you to start the building process and produce an appealing, useful outdoor pizza oven. From laying the foundation to designing the ideal oven floor, every stage will be thoroughly covered in the parts that follow.
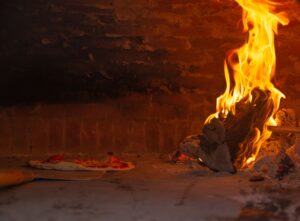
Building the foundation and oven base
Any well-made pizza oven’s backbone is its robust, steady base. Along with the high temperatures the oven will tolerate, its weight calls for a strong foundation to guarantee lifetime and safety. The following is a detailed walk-through instruction on building the oven base.
Laying the foundation
First, get the ground level at your selected site ready. To provide a strong base, dig several inches down; this will help to maintain the oven level and strength. You place a concrete slab as the foundation after the location is ready. This slab should be thick enough at least 4 inches (ca. 10 cm) to withstand oven weight and stop cracking with time.
To create the concrete slab:
- Set up a wooden frame around the dug-out area to shape the slab.
- Mix and pour concrete into the frame, smoothing it out to ensure an even surface. Before proceeding, let the concrete set for at least 24–48 hours.
Using a solid, level concrete slab as the foundation is crucial, as it will prevent shifts in the oven structure that could lead to cracks and instability over time.
Constructing the oven base
Once the foundation is laid, it is time to construct the oven base, which will raise the oven to a suitable cooking height and offer a strong support system. Usually, you will utilize concrete blocks for this as they are strong and oven weight-bearing can be handled by them.
- Stacking concrete blocks: Arrange the concrete blocks in a square or rectangular shape, depending on the dimensions of your oven. You’ll want the height to be at a comfortable level for cooking, usually about 36 inches (ca. 91 cm).
- Securing the blocks: Use refractory mortar between the blocks to add stability and ensure the base doesn’t shift over time. As you go, check if each layer is leveled.
- Additional reinforcement: For added stability, you can pour concrete or add a layer of cement board on top of the base to create a smooth, even surface for the oven floor.
By taking care of these foundational steps, you’ll create a sturdy base that can support the entire oven and ensure durability over years of cooking use.
Creating the oven floor
A pizza oven’s oven floor is essential since it evenly distributes heat, so affecting cooking performance. Building a level, well-insulated oven floor will enable constant cooking periods and high temperatures needed for baking superb pizza, bread, and more.
Using fire bricks for the oven floor
For the oven floor, fire bricks are perfect since they resist great heat without splitting. Fire bricks are made to absorb and radiate heat, unlike normal bricks, thereby providing the ideal surface for cooking pizza.
Here’s how to lay out your oven floor:
- Arranging the fire bricks: Begin by placing fire bricks in a grid pattern over the oven base, ensuring they are flush against one another with no gaps. This will create a smooth, solid cooking surface.
- Using refractory mortar: Apply a thin coat of refractory mortar between each brick to secure them in place. This will prevent the bricks from shifting under the heat and weight of food and cooking tools like a pizza peel.
- Ensuring a flat surface: After laying all the fire bricks, double–check that the surface is completely flat. An even surface will prevent food from sliding or cooking unevenly.
Proper airflow for high temperatures
Maintaining high temperatures depends on appropriate ventilation, which a well-made oven floor enables. Create a room around the base and dome so that air may move unhindered. Good ventilation promotes a continuous, fire capable of reaching the high temperatures required for pizza made from wood.
Building a level, sturdy oven floor with quality fire bricks will produce a surface fit for cooking that can resist frequent high heat exposure. Your pizza oven is now ready for the next phases: building up the dome and getting it ready to effectively hold and radiate heat once the floor is in place.
Constructing the dome
Designed to capture and equally radiate heat over the cooking area, the dome is the center of a wood-fired pizza oven. Since the height, form, and insulation of the dome affect the oven’s effectiveness, building it calls for both great planning and accuracy. This is how to build a dome producing ideal pizzas and more.
Building the dome structure
First, you will have to design a form or mold to guide the dome’s construction. Many builders utilize a temporary sand mold, which after the dome is finished can be readily formed and removed. Here’s how one might begin going:
- Shaping the sand mold: Begin by shaping a pile of sand into a dome form with your desired internal diameter and dome height. Aim for a height that allows for even heat distribution without being too tall, as this could cause heat loss. The standard internal diameter for a home pizza oven is around 32 inches (ca. 81 cm), with a dome height of about 60-65% of the diameter.
- Laying the first course of bricks: Place fire bricks in a circular pattern around the base of the dome, using refractory mortar between each brick to secure them. This first course will serve as the foundation for the entire dome.
- Gradually building upward: Continue adding courses of bricks in a staggered pattern, moving up and inward as you build. This creates a curved shape that will help retain heat. Put on a small layer of refractory mortar every so often to keep the bricks together.
Adding layers for insulation and stability
A well-insulated dome will retain heat longer, so offering more constant cooking temperatures. To enhance heat retention, most pizza ovens include at least one insulating layer over the fire bricks.
- First layer: After completing the brick structure, apply a thin coat of refractory mortar or cement to cover the entire dome, sealing any gaps between bricks.
- Additional insulation: To add insulation, you can use a mixture of clay and straw, or special insulation materials available at hardware stores. Some builders place glass bottles within the insulation layer to trap air pockets, adding even more insulation.
- Finishing layer: Finally, add an outer layer of cement or clay to seal and protect the dome. This outer layer can be smoothed or shaped to achieve your desired look.
Creating a solid, insulated dome with a large hole at the top for the chimney allows hot air to escape without losing essential heat, supporting even cooking temperatures for your wood-fired pizza oven.
Finishing the oven exterior
It’s time to give your pizza oven a complete look once the structural work is accomplished. This phase gives your oven more weather resistance, longevity, and a bit of personal style, thereby turning it into the focal point for your outdoor area.
Applying the first layer and insulation
Applying a protective coating will help you to shield against the elements once the dome construction is completely set. This layer increases oven heat efficiency and strengthens durability.
- First protective layer: Apply a thin coat of cement or refractory mortar over the dome. This acts as a sealant, filling any remaining gaps between bricks and ensuring the dome is weatherproof.
- Adding additional layers: Some builders add more layers of cement or clay, each about an inch thick, to further reinforce the structure. These layers can help protect the oven from temperature fluctuations and weather conditions.
- Optional insulation layer: If you want to maximize insulation, you can add one last layer with materials like clay, sand, or specialized oven insulation blankets. Each additional layer helps the oven maintain high temperatures, which is especially useful if you plan to bake bread or cook other foods that require sustained heat.
Decorative elements
You can add some unique touches once the oven is insulated and safeguarded. Many pizza oven builders decide to accentuate their outside area by decorating the outside, therefore creating a distinctive feature.
- Mosaic tiles: Consider adding mosaic tiles around the dome for a colorful, Mediterranean-inspired look. Tiles are weather-resistant and come in a range of colors and designs, allowing you to create a pattern or style that fits your backyard aesthetic.
- Stones or bricks: You can also add a layer of decorative stones or clay bricks for a rustic look that blends with the natural surroundings. This layer adds visual appeal and provides extra protection for the oven.
- Paint or stain: Some people decide to apply weatherproof paint or stain to the exterior, especially if the oven is made with materials that can absorb moisture. Just be sure to use heat-resistant products for safety.
Bringing the oven to life
Right now, you have a lovely and useful finished oven. Once you have invested time and effort in building and completing the oven, you may appreciate your work and get ready to begin the curing process, therefore guaranteeing the readiness of the dome and structure for high temperatures.
Your pizza oven will seem to be a very distinctive component of your house if you finish the last details and add ornamental accents. Your oven can become not only cooking equipment but also a unique highlight of your outdoor space, ready to offer years of delicious wood-fired dinners with some personalizing.
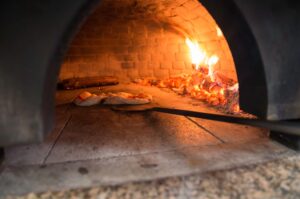
Preparing the oven for use
Your pizza oven is almost ready to begin cooking now it is built and exquisitely finished. But first, you have to cure the oven if you are to attain those high temperatures for ideal pizzas. Using a slow heating process, curing helps the oven components settle and solidify correctly, therefore providing long-lasting durability and preventing cracks.
The curing process
To progressively eliminate any moisture caught in the layers of bricks, mortar, and insulation, you must cure your pizza oven. Particularly in the dome and oven floor, skipping this operation or heating the oven too quickly might cause structural flaws.
- Start with small fires: Begin by lighting a small fire inside the oven. Use small sticks and pieces of wood to create a gentle, low heat. Let this fire burn for a few hours, keeping the temperature low to avoid any stress on the oven materials.
- Gradually increase the fire size: Over a few days or weeks, start building slightly larger fires. Each day, increase the heat level incrementally, allowing the oven to adjust slowly. Aim for a slightly hotter fire each time, but still avoid high temperatures until the curing process is complete.
- Monitor for moisture: During this phase, it’s normal to see steam or moisture coming from the oven as the internal layers dry out. Continue with small, controlled fires until the moisture stops, which signals that the oven is fully cured.
Though it takes several weeks, this curing procedure is well worth the waiting. Correct curing guarantees that your oven can run at high temperatures without damage, therefore preparing it for years of dependability.
Final preparations before cooking
Your oven is ready for first high-temperature use once the curing procedure is finished. To ensure everything is firmly in place, first inspect the integrity of the structure especially the dome, chimney, and oven floor before delving into cooking. To acquire a feel for the behavior of your oven, you could also choose to attempt building a tiny fire and controlling the heat levels.
Now that your pizza oven is completely cured and ready, it’s time to get to the exciting part: cooking bread, pizza, and other mouthwatering cuisine wood-fired!
Cooking with your wood-fired pizza oven
Using a wood-fired pizza oven offers outdoor eating an exciting, flavorful, and somewhat traditional experience. From fire starting to make your first pizza, here’s how to maximize your oven.
Starting the fire
Starting a fire in your wood-fired pizza oven calls for the correct type of wood and a slow heating rate to get the high temperatures required for pizza cooking.
- Choosing the appropriate wood: Use dry, hardwood pieces, as they burn cleaner and hotter than softwoods. Suitable options include oak, maple, or hickory. Avoid using treated or painted wood, as it can release harmful fumes.
- Building the fire: Start with a few small sticks and build up gradually to larger pieces of wood. This will help the oven floor and dome absorb the heat gradually. Keep the fire towards the back of the oven to allow space for cooking at the front.
- Monitoring airflow: Ensure the chimney and door area provide adequate airflow. Proper airflow is key to maintaining a consistent temperature and keeping the fire burning evenly.
Once the oven is fully heated, you’ll be able to maintain a high cooking temperature, Pizza should be cooked at temperatures of about 800 °F (427 °C).
Cooking techniques for wood-fired pizza and more
You can start cooking when your oven gets to the right temperature. Pizza cooks quickly in a wood-fired oven usually in one to two minutes, hence you have to monitor your dish very closely.
- Using a pizza peel: A pizza peel is essential for placing and removing food from the oven. Dust the peel with flour or cornmeal to prevent the dough from sticking, then slide the pizza onto the oven floor.
- Rotating the pizza: High temperatures mean that the side closest to the fire will cook faster. Every 20 to 30 seconds, turn the pizza over on the peel to make sure it cooks evenly. This will give the crust a crispy, even finish.
- Experimenting with cooking times: Each wood-fired pizza oven has its quirks, so take time to learn how yours retains heat and adjusts to different types of food. You can also bake bread, roast vegetables, and cook meats by adjusting the fire size and placement within the oven.
Temperature control and heat management
Temperature control is a skill that comes with practice. Here are some tips to manage heat and get the best cooking results:
- Maintaining high heat for pizza: For pizzas, aim to keep the temperature around 800 °F (ca. 427 °C) by adding small amounts of wood as needed. This will keep the oven hot without overwhelming the cooking space.
- Lowering the temperature for other foods: If you want to cook items like bread or meats that require lower temperatures, allow the fire to die down slightly and let the oven’s residual heat cook the food.
- Managing airflow to control heat: Adjusting the airflow by opening or closing the door One can help control the temperature using the chimney. While opening the door promotes airflow and may lower the temperature, closing the door slightly traps heat.
Cooking with your wood-fired oven is a hands-on, fun hobby that honors experimentation. Every session will enable you to better control the heat, manage the fire, and produce outstanding outcomes with several meals. After a little practice, you’ll be making bread and pizzas more like a seasoned pro in no time!
Summary
Creating a wood-fired pizza oven at home turns your outside area into a center for entertainment and cooking. Using fire bricks and refractory mortar for heat retention, you will build a dome beginning with a strong foundation and oven base. Gradually heating the oven helps to ready it for high temperatures, so guaranteeing durability. Once cured, you can begin creating mouthwatering pizzas, bread, and more, honing heat management and cooking methods for the best results. Your outdoor pizza oven will offer distinctive tastes and interesting cooking opportunities for years to come with careful design, premium materials, and patience.
If you want morе еxciting contеnt visit. Globallyviz.com









Comments