
Upgrading your 4×4 vehicle with a suspension lift kit can significantly improve off-road performance, ground clearance, and the overall aesthetic appeal of your vehicle. However, installing a suspension lift kit is a complex process that requires careful planning and execution.
This step-by-step guide will walk you through the essential steps to install 4×4 suspension lift kits to ensure a successful and safe installation.
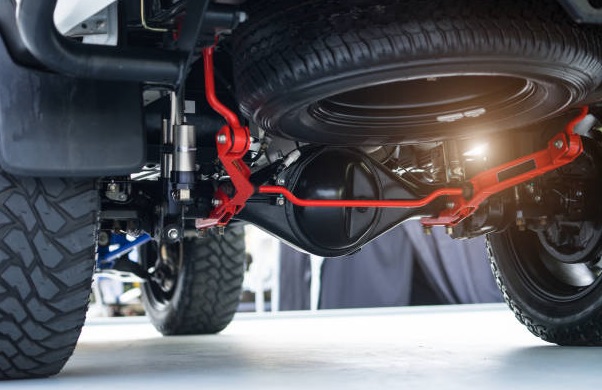
What are Suspension Lift Kits?
One must first know what a suspension raise kit is and why it would be useful before starting the installation project. A suspension lift kit raises the vehicle’s suspension, allowing for larger tires and improved off-road capability.
There are different types of lift kits, including body lift kits and suspension lift kits, with the latter being more comprehensive and offering better performance enhancements.
Tools and Materials Needed
To install a 4×4 suspension lift kit, you’ll need the following tools and materials:
- Suspension lift kit (specific to your vehicle model)
- Jack and Jack stands
- Socket and wrench set
- Torque wrench
- Screwdrivers
- Pliers
- Rubber mallet
- Spring compressor (if required)
- Penetrating oil
- Anti-seize compound
- Brake line extensions (if required)
- Steering stabilizer (optional but recommended)
- Service manual for your vehicle
Step 1: Preparation
- Read the Instructions: Carefully read the instructions provided with your lift kit. Different kits may have specific requirements or steps that you need to follow.
- Safety First: Engage the parking brake while your car is on a level, flat surface. Ensure you have adequate lighting and ventilation in your workspace.
- Disconnect the Battery: To prevent any electrical mishaps, disconnect the vehicle’s battery.
Step 2: Lift the Vehicle
- Jack Up the Vehicle: Use a high-quality jack to lift the front of the vehicle. To hold the frame, place the jack stand beneath it. Repeat the process for the rear of the vehicle, ensuring that it is stable and secure before proceeding.
- Safety Tip: Always use jack stands in addition to the jack to ensure the vehicle is securely lifted. Never rely solely on the jack.
Step 3: Remove the Existing Suspension Components
Front Suspension
- Remove the Shock Absorbers: Use a socket wrench to remove the bolts securing the shock absorbers. Carefully remove the shock absorbers.
- Disconnect the Sway Bar: Unbolt the sway bar links to allow for more movement in the suspension.
- Remove the Coil Springs: If your vehicle has coil springs, use a spring compressor to safely remove them. If it has leaf springs, proceed to the next step.
- Safety Tip: Compressing coil springs can be dangerous. Ensure you use a high-quality spring compressor and follow all safety instructions.
- Remove the Control Arms: Unbolt the control arms and remove them from the vehicle.
- Additional Step: Mark the position of the control arms before removal. This will help with alignment during reinstallation.
Rear Suspension
- Remove the Shock Absorbers: Similar to the front, remove the rear shock absorbers.
- Disconnect the Leaf Springs or Coil Springs: If your vehicle has leaf springs, unbolt them and remove them. If it has coil springs, use a spring compressor to safely remove them.
- Additional Step: If your vehicle has leaf springs, be cautious of the leaf spring tension. Support the axle with a jack stand before removing the bolts.
- Remove the Control Arms: Unbolt the rear control arms and remove them.
- Additional Step: Take note of the control arm orientation and placement for easier reinstallation.
Step 4: Install the New Suspension Components
Front Suspension
- Install the New Control Arms: Link the vehicle’s new control arms to the lift kit.
- Install the New Coil Springs: If your kit includes new coil springs, use the spring compressor to install them safely. Go on to the next stage if it calls for leaf springs.
- Install the New Shock Absorbers: Attach the new shock absorbers to the vehicle, securing them with the provided bolts.
- Reconnect the Sway Bar: Reattach the sway bar links to the sway bar.
Rear Suspension
- Install the New Control Arms: Attach the new rear control arms provided in the lift kit.
- Install the New Leaf Springs or Coil Springs: Use the spring compressor to install the new coil springs, or bolt on the new leaf springs.
- Install the New Shock Absorbers: Attach the new rear shock absorbers to the vehicle, securing them with the provided bolts.
Step 5: Adjust the Brake Lines and Other Components
- Brake Lines: If your lift kit includes brake line extensions, install them now. Ensure that the brake lines are not stretched or pinched, as this could lead to brake failure.
- Steering Components: Depending on the lift height, you may need to install a new steering stabilizer to maintain proper steering control. Use the stabilizer’s recommended directions.
- Driveshaft: Check the driveshaft angles to ensure they are within acceptable ranges. Some lift kits may require driveshaft modifications or extensions.
Step 6: Reinstall the Wheels and Lower the Vehicle
- Reinstall the Wheels: Once all the new suspension components are installed, reinstall the wheels and hand-tighten the lug nuts.
- Lower the Vehicle: Using the jack, carefully lower the vehicle to the ground. Once on the ground, use a torque wrench to tighten the lug nuts to the manufacturer’s specifications.
Step 7: Final Adjustments and Checks
- Align the Wheels: After installing a suspension lift kit, it’s essential to have a professional wheel alignment done. This guarantees evenly worn tires and proper handling of your car.
- Check All Bolts and Nuts: Go over all the bolts and nuts you have worked on to ensure they are properly tightened.
- Test Drive: Take your vehicle for a test drive to ensure everything is functioning correctly. Note any odd sounds or handling problems.
Enjoy Your Lifted 4×4
Installing a 4×4 suspension raise kit may be a fulfilling endeavor to improve the look and performance of your car. However, it requires careful planning, the right tools, and attention to detail. By following this step-by-step guide, you can successfully install your lift kit and enjoy the benefits of a lifted 4×4.
Always remember to prioritize safety and consult a professional if you encounter any difficulties during the installation process.
If you want morе еxciting contеnt visit. Globallyviz.com


Comments